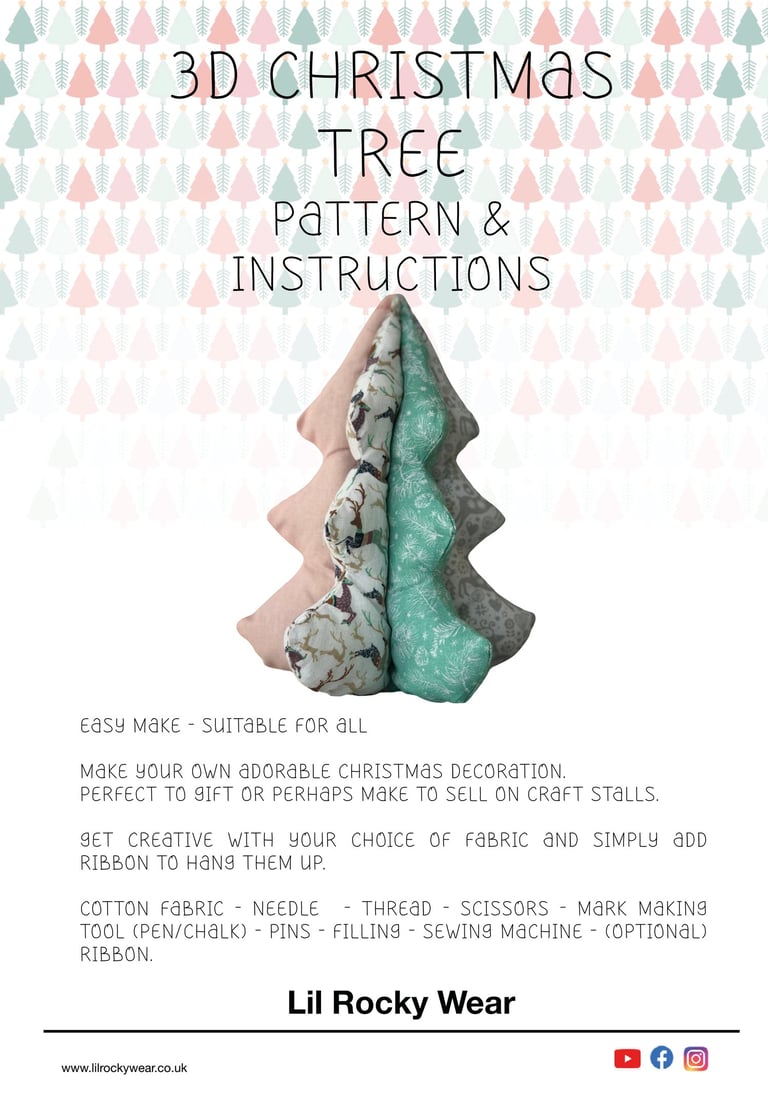
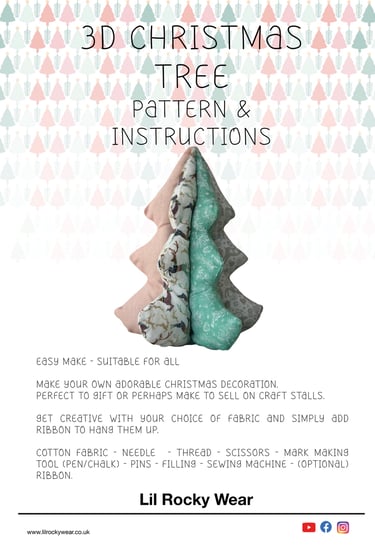
3D Christmas Tree Decoration
Easy make - Free Downloadable Printable Pattern. Create Your Own Festive 3D Christmas Tree Decoration! 🎄✨ Looking for a fun and creative way to add a handmade touch to your Christmas decorations? This 3D Christmas tree decoration is a perfect craft project for beginners and experienced makers alike! Using just a few materials, you can design a charming ornament. Follow this step-by-step guide to bring festive cheer to your home!
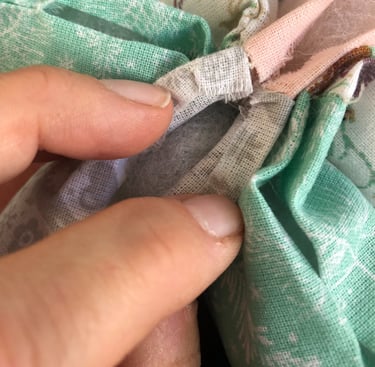
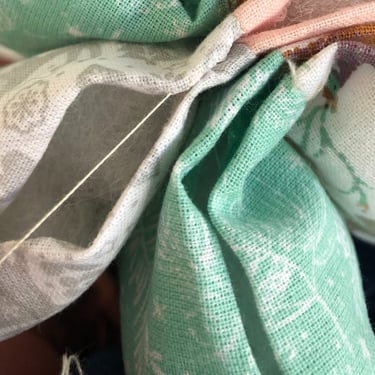
Step 7
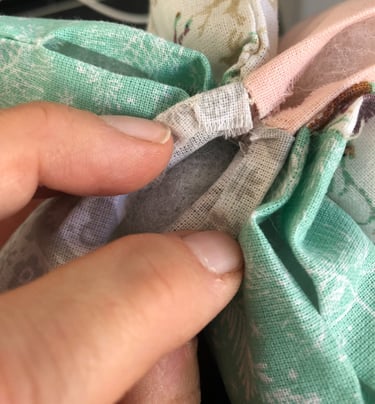
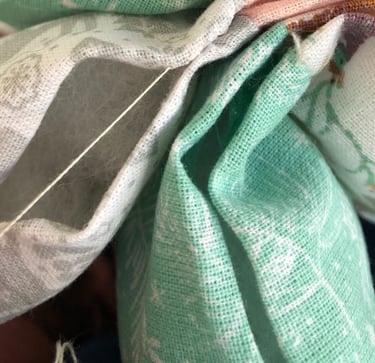
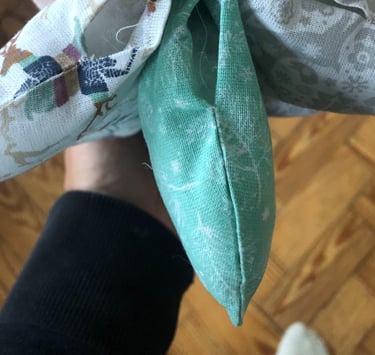
Flip over to the base (where the gaps are). This is where you will push wadding into the tree halves. Use a chopstick or pencil to carefully guide the soft fill into the corners.
When adequately stuffed, use a hand needle and thread to slipstitch the gaps closed.
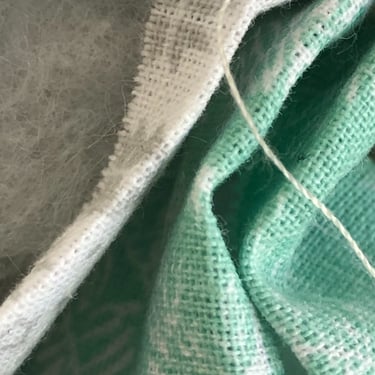
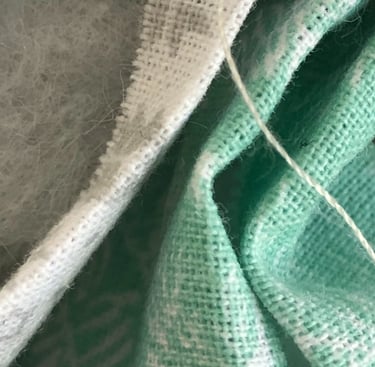
Slipstitch—sometimes called a ladder stitch—is an almost invisible technique used to close openings requiring stuffing. Work from right to left with a knotted thread and match your thread color for better invisibility.
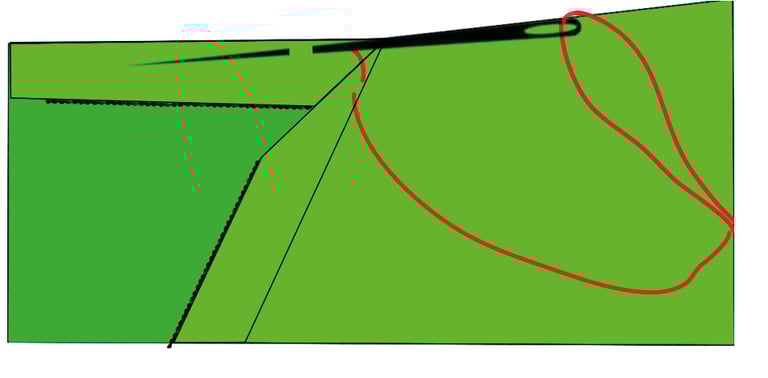
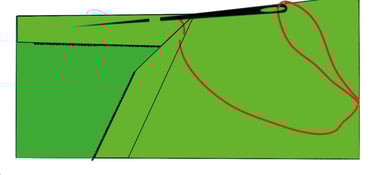
To sew a slipstitch by hand:
Insert the needle between the two pieces of fabric so that the knot is hidden between the layers.
Pick up a small amount of fabric from inside the seam allowance of the gap.
Bring the needle up a short distance along, then insert it back into the folded edge on the opposite side of the opening.
Pull through and repeat until the gap is closed.
This technique continues the look of a seam without visible stitches.

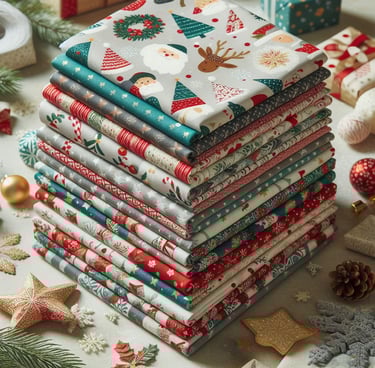
Christmas Crafts Made Simple
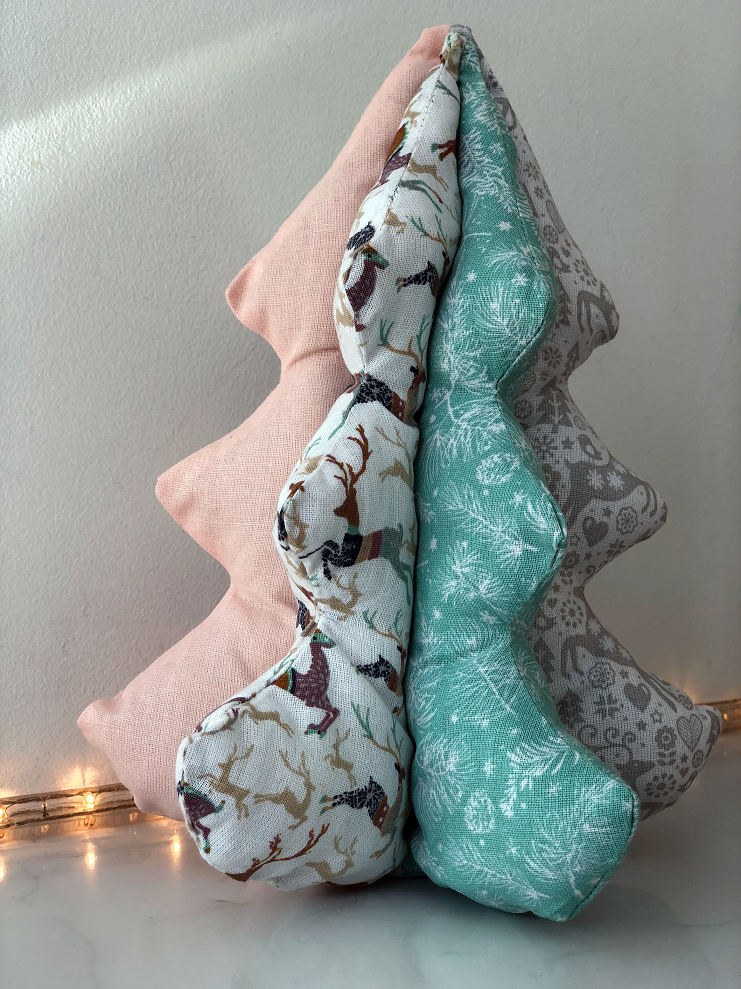
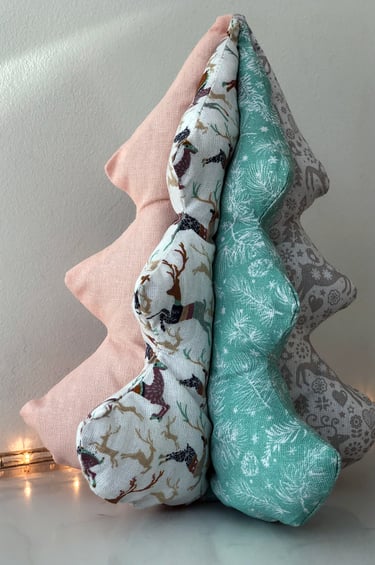
Create this stunning 3D Christmas tree with ease using our free printable PDF design. Perfect for fat quarters or leftover cotton fabric, this craft is versatile and fun! Use your handmade trees to decorate your home, gift them to loved ones, or even sell them as part of your creative venture.
Includes a detailed YouTube tutorial for step-by-step guidance.
The finished tree measures approximately 25 cm by 19 cm (or 9 3/4" by 7 1/2")—a lovely addition to your holiday décor!
Project Requirements
Sewing Machine (optional, as hand sewing can also be used)
Matching Thread
Hand Needle
Pins
Mark-Making Tool (e.g., chalk, heat-removable pen, etc.)
Printer or Lightbox (for tracing the template)
Stuffing/Wadding/Soft Fill (approx. 100g per 3D Christmas tree)
Cotton Fabric
Scissors
Printable Templates (downloadable)
Tip: Fat Quarter packs are fantastic for this project as they are pre-coordinated and made from good-quality cotton.
Note: The templates include a 1 cm seam allowance.
Fabric Requirements
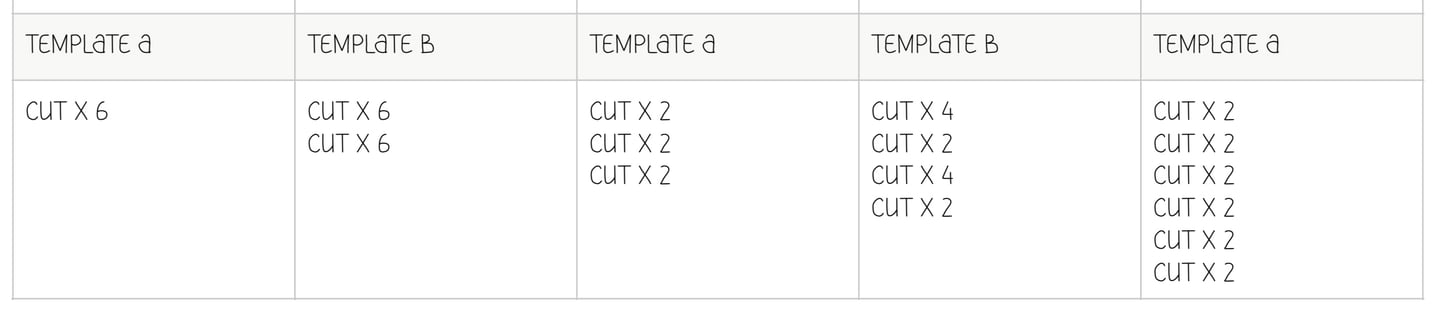
Template A: To make one Christmas tree (using all one fabric)
Total fabric: 45 cm x 83 cm
Per template piece: 23 cm x 27 cm
Template B: To make one Christmas tree
Per template piece: 27 cm x 13.5 cm (x12)
How Much to Cut?
(See below for some variations to get you started!)
Step 1
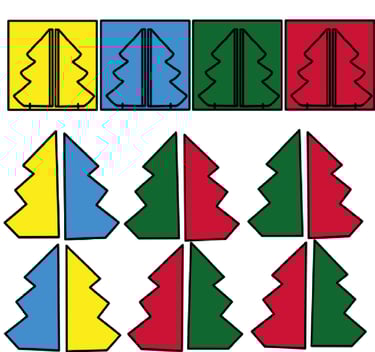
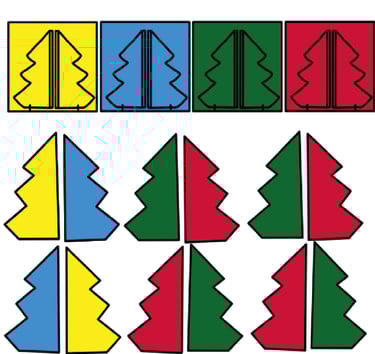
Decide which and how many different fabrics you would like to use.
Do you want the Christmas tree to be all one fabric, two, four, or six different fabrics?
Step 2
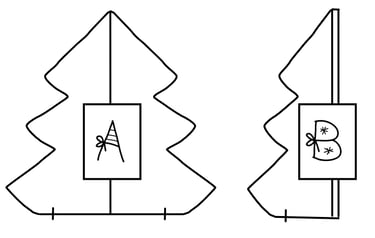
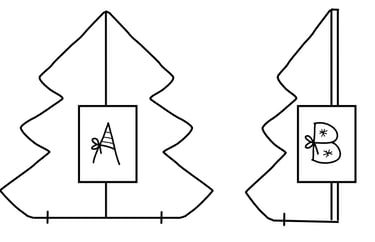
Print the template, selecting the correct one depending on your fabric choice: Template A or B.
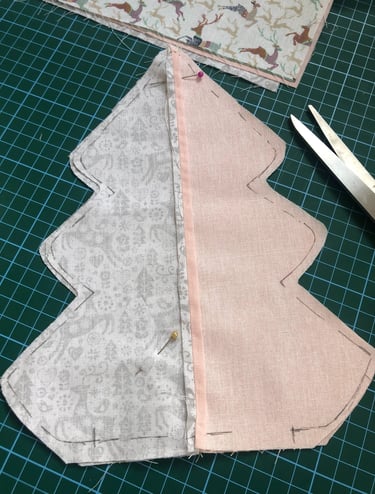
Use the 1 cm seam allowance down the middle to join the Christmas tree halves
Right sides facing, trim and press.
Pin Pairs:
With right sides facing, pin together the matching pairs so the corresponding fabrics align perfectly.
Template A and B:
Use a 1 cm seam allowance to stitch neatly all around the edge. Leave an opening between the two notches at the base of the template.
Step 3
Pin your template onto the fabric (ensure the fabric is pressed beforehand).
Step 5
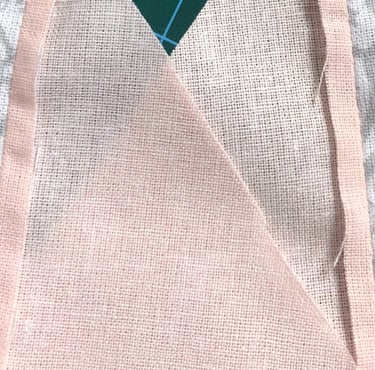
Turn to the right sides out and press the Christmas tree. Lay the trees on top of each other.
If using the same fabric throughout, it does not matter how you stack the layers. However, consider the placement if you're using different printed fabrics. For example, if you're using four different fabrics, place the one different fabric in the middle of the stack.

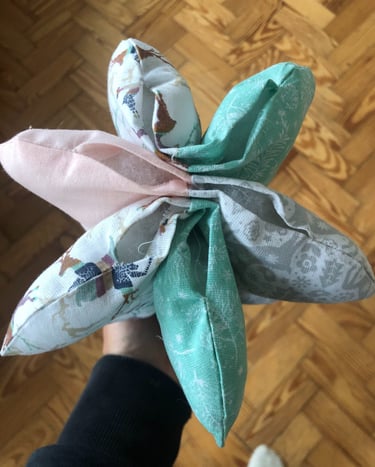
Step 6
When happy with the placement of the fabrics, accurately line up the stack and pin them together. Straight stitch right through the centre of the tree stack. Ensure that either end of the stitching is secure.
Before you stitch, place a piece of ribbon between the first and last tree if you wish to hang your decoration.
Step 4
Cut out the required number of Christmas tree halves (Template B only).
Each fabric selection needs at least one pair. See the example below using four different fabrics
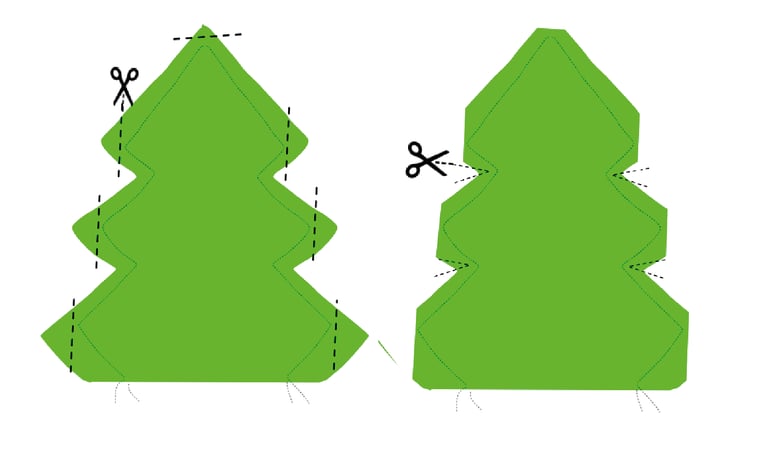
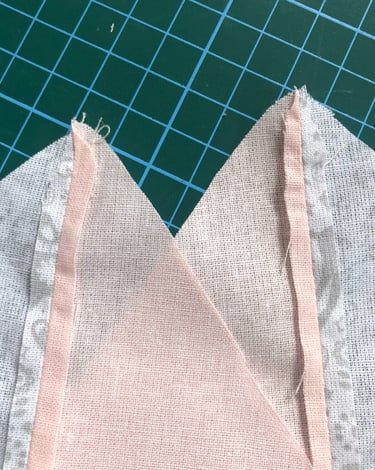
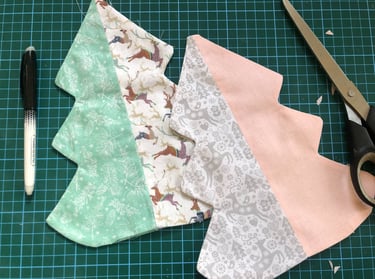
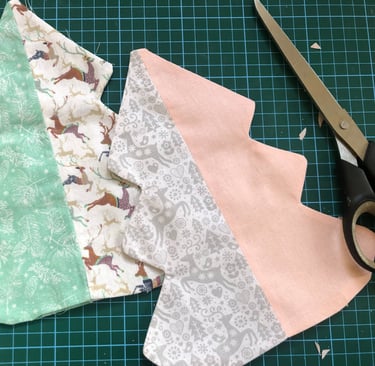
Turn inside out and snip into the seam allowance carefully. The goal is to remove bulk and extra fabric from the points.
Be careful not to cut into the stitch line or too close to the stitch, as this will weaken the seam.