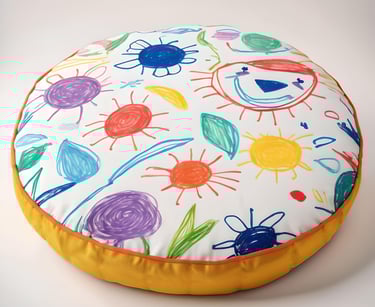
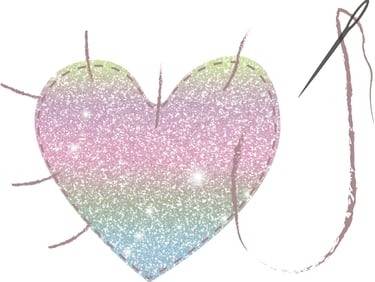
Childs Art Cushion
IDEA starter: What if you could turn your child’s artwork into a cosy and cute cushion that brightens up your living space or to gift to loved ones? With this easy sewing project, you can do just that! Please note: This post contains affiliate links.
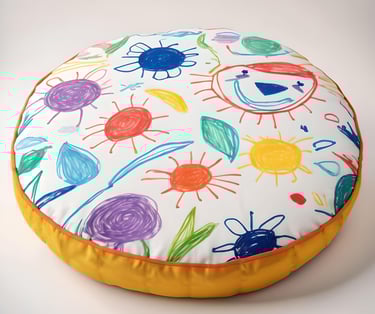
Imagine transforming your child’s artwork into a cosy, adorable cushion that brightens your home or makes a thoughtful gift for loved ones. With this simple sewing project, you can do just that! Follow these easy steps to create a fabric crayon or felt appliquéd cushion that captures your child’s creativity and fills them with pride. It’s a wonderful way to celebrate their imagination while creating a keepsake you’ll cherish for years.
In this blog post, I’ll show you how to make a personalised circular cushion using a simple drawing and appliqué technique. I’ll cover tips for preparing your child’s artwork, transferring it onto fabric, and sewing it into place. With basic sewing skills and a few supplies, you can create a unique cushion that showcases your child’s imagination and adds a heartwarming pop of colour to any room. Follow along as we go step by step through this sentimental appliqué project using your child’s one-of-a-kind artwork.
I used to teach secondary school textiles, and one of my (and my pupils’) favourite projects was making cushions using Bondaweb and felt. Bondaweb is a web adhesive on paper that allows you to fuse fabrics together by ironing. We would use it to create appliqués, patterns, and designs on cushions, making each piece truly special.
STEP 1: Gather Materials
To make an appliquéd circle cushion, you will need the following supplies:
- Zipper, 45.5cm / 18 inches long: Try to get a sturdy zipper made for upholstery. You can find these at craft stores or online.
- Circle cushion pad, 45.5 diameter: Look for a cushion form in the exact size of your finished cushion, either 45.5cm or 18 inches across. Upholstery supply stores will have standard round sizes.
https://amzn.to/48rNVe7 - I bought mine from amazon: Willows Direct Hollowfibre Filled Cushion Pad Insert/Filler (Round 18"/45cm) Pack of 2 for £7.99 (price correct at time of writing)
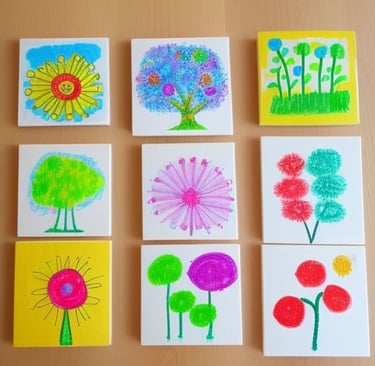
- Child's artwork: Have your child create artwork you want to feature on the cushion, using crayons, markers or paint on paper. Make sure the design will fit inside a 45 cm circle. – OR – have your child apply their creativity direct to the fabric!
- Medium weight fabric: For the cushion background, get a meter/yard of a plain medium weight cotton or linen
- Fabric crayons and or fabric felt pens: Special fabric crayons allow you to trace designs onto fabric or draw straight onto fabric. Look for a set of bright colours so you can match the hues in the artwork.
https://amzn.to/48L9m9H - Fabric Crayon Pack of 12 Vibrant Colours £4.74 (price correct at time of writing)
https://amzn.to/3NSbpRl - Pack of 20 Fabric Pens / Textile Markers Dual Tip £8.95 (price correct at time of writing)
- Bondaweb: This double-sided fusible web adheres appliqué pieces to fabric. How much you'll need will depend on your child’s design.
https://amzn.to/3NUXqKq - Vilene Bondaweb 329 - 1m x 45cm £3.80 (price correct at time of writing)
- Patterned print fabric: For the applique shapes/motif, small scraps or a charm pack would work well.
- Sharp scissors: You'll need a good pair of sharp scissors for cutting out appliqué shapes.
-Pins:
- Iron: Use a dry iron set on medium heat to fuse the Bondaweb and heat heat the crayon/felt pen design.
- Sewing machine (optional): A sewing machine makes quick work of satin stitching the edges, but hand sewing also works.
Having all materials prepared ahead of time will make the project go smoothly.
Disclosure: This above list contains affiliate links, which means I may receive a commission if you click a link and purchase something that I have recommended. While clicking these links won’t cost you any extra money, they will help me keep this site up and running. Thank you for your support!
Step 2: Prepare the Artwork
Selecting the right portion of your child's artwork is an important first step before transferring it onto fabric. Here are some tips:
- Focus on the most meaningful, colourful, or sentimental portion of the artwork. Avoid selecting peripheral elements or blank space.
- Pick an area of the artwork that will scale well when enlarged onto the circle cushion. Fine details or thin lines may get lost.
- Print or trace the artwork onto paper at the actual size you want it to appear on the cushion. This allows you to visualize how it will look enlarged.
- Cut out the portion of artwork you want to use. Consider leaving at least a 5-10 cm margin around the edges to allow for seam allowances when sewing the cushion.
- Avoid choosing artwork areas that are too complicated. The finished design should have clean edges and recognizable shapes.
- For best results transferring artwork onto fabric, choose thick lines, large shapes, and areas with blocks of solid colour.
The portion of artwork you select will be the focal point of your custom cushion. Take your time choosing the right area to beautifully showcase your child's creation. Enlarging and transferring a special snippet onto fabric is a meaningful way to cherish their artwork.


Step 3: Transfer the Artwork
This is where we take your child's gorgeous artwork and transfer it onto fabric so it can become a beautifully personalized cushion.
The key materials needed for this step are:
- The child's already existing artwork – can be any medium, such as crayons, collage, markers or paint.
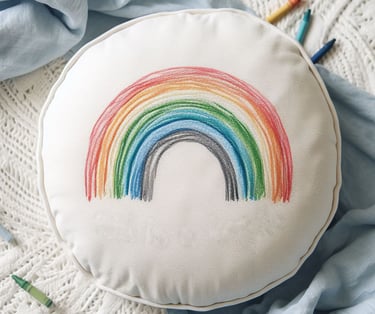
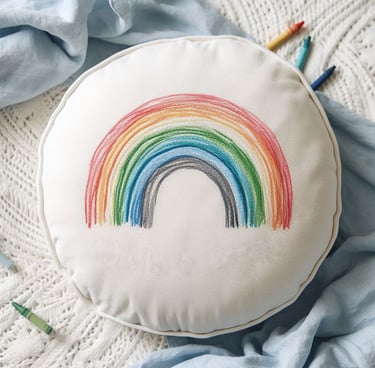
-Fabric crayons/felts - Transfer onto fabric using a window/light box to trace using fabric crayons. Or, have the child draw directly onto the fabric using fabric crayons/felt pens (leaving a good 5/10cm border so the design isn’t eaten up in the seam allowance.) the crayons add a wonderful naive quality to the cushion design which suits a childs design style.
- Bondaweb - This is an iron-on adhesive that looks like paper on one side. It's used to fuse fabrics together.
- Iron - To activate the bondaweb adhesive and to heat set the fabric crayons/felts (following the manufactures instructions.)
- Applique Fabric(s) - Such as cottons, linens, felts etc to add to the design. Avoid very lightweight fabrics like silks that could move during ironing.
IDEA: Use a mix of fabric crayon and applique, freehand drawing using the fabrics crayons and or felts straight onto the fabric.
To transfer an existing drawing: Lay your base fabric flat (iron first) with the artwork placed underneath. Use a light source under the artwork and fabric to help you trace the design, such as a window or light box.
Trace the design using the fabric crayons/felt pens, fix the marks using a hot iron (please follow the instructions found on the crayons packaging).

Step 4: Cut Out the Applique Pieces
When you’ve decided on the shape of the applique motifs that fit well with the childs artwork, draw them onto paper, to create a template. Then place them face down onto the paper side of the bondaweb draw around and roughly cut out.
Iron down onto the wrong side of the selected applique fabric (not your cushion fabric yet), following the instructions from the bondaweb packaging. But as a guide, set the iron to a medium-high heat. In sections, place the iron firmly on top of the artwork and iron for 10-15 seconds. Do not slide the iron around, just press down firmly.
Carefully cut out each of the applique shapes using sharp scissors for clean edges.
Once cooled, gently peel back the top paper layer of the bondaweb. The fabric motif/shape should have transferred onto the adhesive.
Once all the pieces are cut out, lay them out and ensure you have all the shapes needed to complete the artwork design before moving onto the next step.
Tips:
- Cut out the sections of bondaweb needed rather than using a whole sheet.
- Take extra care cutting out any fine details or small pieces. Consider using tweezers or small embroidery scissors for better control. Tiny pieces can easily get lost!
Pin and Fuse Applique Pieces
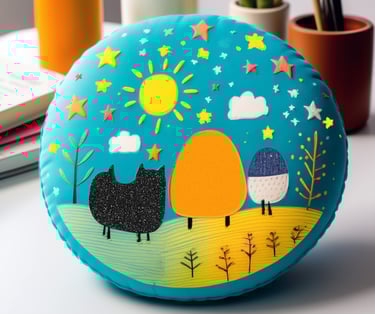
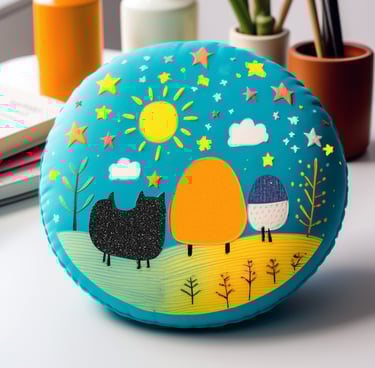
Now that you've cut out all the fabric applique pieces, it's time to pop them onto the cushion fabric to fuse them in place. This crucial step ensures your applique shapes stay perfectly positioned before sewing them down.
Start by laying out your cushion fabric with the right side facing up. Then, place your applique pieces on top where you want them, arranging the shapes to match the artwork. Peel off the backing bondaweb paper from each shape.
Once all the pieces are in place, it’s a good idea to put a sheet of parchment paper over them, incase there are any rough pieces of glue that may stick to your iron. Set your iron to the cotton setting. In sections, press the iron down firmly and hold for 5-10 seconds. Move the iron around to cover the entire area with applique pieces.
The heat from the iron will activate the fusible web on the back of the applique pieces, adhering them securely to the background fabric.
Lift the parchment paper and check that all the edges look neatly fused down. Reapply the iron to any edges that may have lifted or bubbled up. Let the fabric cool fully before moving to the sewing step.
Now your unique applique design is ready to be neatly stitched down!
Using fabric pens or crayons direct to fabric can also look fab - this piped design doesn't include any appliqued fabric and has its design drawn straight up into the seam allowance but looks amazing.
Step 5: Sew the applique pieces
Each of the newly bonded applique pieces now needs to be stitched in place before sewing the cushion together. Think about your stitch colour, contrast, or matching the fabric.
Satin stitch, running stitch etc
Carefully stitch around each shape, stitching as close to the edges as possible for a neat finish. Backstitch at the start and end to secure. You could also incorporate some hand embroidery stitches!
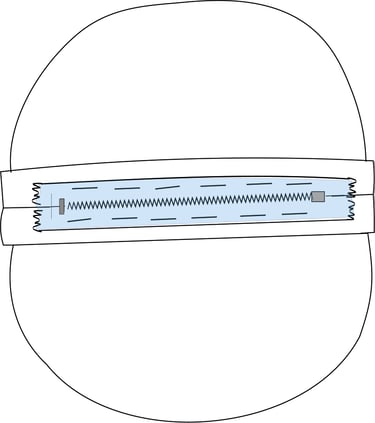
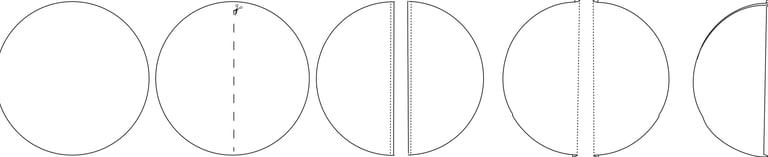
Step 6: Attach the zipper
Take your two circle cushion pieces and cut one circle piece in half directly down the middle. Fold a 1-cm SA over to the wrong side along both straight edges, crease in place. Pin together the two half circles, right sides together, then follow the instructions for inserting a zip.
BASTE: Using the longest stitch on your sewing machine (or hand tack), straight stitch along the lightly creased 1 cm seam allowance. Finish off the raw edges using a zigzag, overlocker, serger, or pinking shears, and press open.
Place the zip on top of the seam, with the teeth facing directly over the tacked opening. Pin and hand-tack the zip in place along both edges. You will need to open the zip slightly before tacking the part with the zip pull. Check that the zipper is aligned straight along the seam. Once tacked and happy with the placement, remove any pins.
With the zip foot attached to the sewing machine, looking at the right side of the fabric, stitch the zip in place, keeping the line straight and an even distance from the edge. Use a guide or draw a straight line to follow directly onto the fabric using a retractable pen or chalk.
Sew a small way down, i.e., 5 cm, stop with the needle down in the fabric, lift up the presser foot, and move the zip pull out of the way. Lower the presser foot and continue.
When you reach the bottom of the zip, leave the needle down, press your foot up, and pivot 90 degrees to continue across and then pivot to continue stitching the other side of the zip.
Remember to reverse stitch at the start and end of the stitching line.
Use a seam ripper to remove the temporary tacking stitches.
TACKING: long temporary stitches—rough and ready is fine! Basting is the same: long and temporary stitches, but using a sewing machine.


Step 7: Joining the cushion panels
With the right sides facing, place the two prepared circles together so the raw edges meet. To ensure that the cover can be turned to the right side out after stitching, unzip the zipper until it is more than halfway down. Using a 1 cm seam allowance, pin and sew the entire circumference, being careful to backstitch the beginning and end of the seam. Using an overlocker/serger or pinking shears, trim off any excess seam allowance, flip the cushion cover to the right side, and pop the cushion pad inside.
Extras to consider
Piping. Adding piping to the cushion is a technique that involves sewing a length of cord covered in a strip of matching or contrasting fabric, folded over, and sewn into the seam of the cushion.
Changing the shape of the cushion (square, rectangular, etc.)
Folded pillow case (instead of a zip closure)
Sealed pillow case (can't remove the cushion pad / no zip) - Place the two cushion pieces, right sides together, and stitch all round, taking a 1 .5cm seam allowance and leaving a large opening along one side. Clip the corners and turn right side out. Press the seamed edges, then insert the cushion pad and slipstitch the opening to close
You could also incorporate some hand embroidery stitches!