Hop Into Easter: A Step-by-Step Guide to Making a Cute Bunny Bottom Cushion
Spring is in the air, and what better way to welcome the season than with a playful bunny-themed craft? I originally made this bunny cushion on a whim, without planning to document it or share it on the blog. But recently, I came across a sherpa-style kids' blanket in B&M, and it sparked an idea. I thought it would pair wonderfully with some small floral fabric scraps or pre-bought fat quarters to create a bunny bum cushion. So, I've put together some step-by-step instructions for you to make your own!
IDEASTIPSAPPLIQUECUSHION

Standard Circle Cushion Sizes
Store-bought circle cushions typically come in the following standard sizes:
Small: 30 cm (12 inches) diameter
Medium: 40 cm (16 inches) diameter
Large: 50 cm (20 inches) diameter
Extra Large: 60 cm (24 inches) diameter
Materials Needed
Fabric of your choice (cotton, fleece, linen, velvet, etc.)
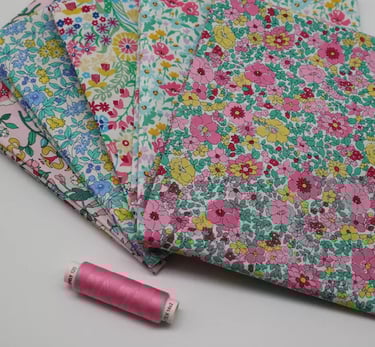
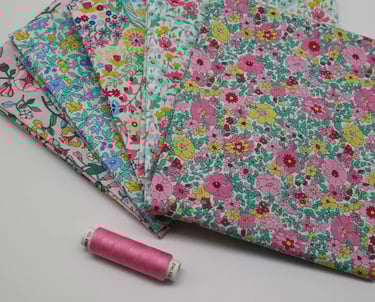
(I recently bought a sherpa-style blanket for about £5 from B&M, which would work amazingly for this little project, paired with some scraps of liberty type floral print fabric! 😍)Cushion filling (polyester stuffing or a pre-made cushion insert)
Matching thread
Scissors
Pins or fabric clips
Sewing machine (or needle for hand sewing)
Measuring tape or compass
Fabric marker or chalk
Iron
Pom-pom (for the 🐇 tail) – either pre-made or homemade using fluffy yarn, or fabric and stuffing to sew a tail
I have created a printable pattern template for the bunny tail and feet based on a 40cm cushion pad. you can find the FREE download linked at the end of the post!
Instructions
1. Prepare Your Fabric
Use a measuring tape or compass to draw a circle onto a cardboard template or directly onto your fabric. The diameter should be your desired cushion size plus 2.5 cm (1 inch) for seam allowance (SA). You could also use the cushion pad as the template then add the SA.
Cut two identical fabric circles.
Print and cut out the oval-shaped foot pattern pieces (these also include the paw pad shapes). Alternatively, draw your own.
Cut four fabric pieces for the feet: two for the left foot, two for the right (mirror-imaged!).
Cut out the small fabric pieces for the paw pads (two sets, mirror-imaged).
2. make the Feet
Appliqué the paw pads onto the foot pieces first. Pin them in place using the paper pattern/image above as a guide. Then, either zig-zag or straight stitch neatly around the edges. Choose a thread color that blends with your fabric.
Pin two foot pieces together with right sides (RS) facing—one plain piece, one with appliquéd paw pads.
Straight stitch around the shape, leaving a small gap (just a few cm) for turning through.
Repeat for both feet—you should now have a left and a right foot.
Turn right side out, then slip-stitch/ladder stitch the gap closed on both feet.
3. Pin and Sew the Cushion
Place the two fabric circles right sides (RS) together.
Pin around the edges, leaving a 7.5-10 cm (3-4 inch) gap/opening for turning and stuffing.
Sew (straight stitch) around the cushion using your added seam allowance (2.5cm), backstitching at the start and end to secure.
4. Clip and Turn
Clip small notches along the curved edge (without cutting the stitches) to help the fabric lay flat.
Turn the cushion right side out and press with an iron. Do not close the gap yet!
5. Bunny Tail
Create a pom-pom (size of your choice). For example, for a 40 cm diameter cushion, I recommend a 14 cm diameter pom-pom. Use a wool/yarn of your choice.
If making a fabric tail instead of a pom-pom, either use the included paper pattern or cut a fabric circle (approx. 28 cm diameter). Gather the edges with a running stitch, stuff lightly, and sew onto one side of the cushion panel.
Use the cushion turn through gap to help you sew it in place, ensuring you only attachyour tail to one side of the cushion.
6. Attach the Feet
Similar to attaching the tail, pin the feet in place and check they are level.
Sew them on, again, utilising using the turn through gap in the cushion, ensuring you attach the feet to the same panel as the tail.
7. Fill the Cushion
Stuff with polyester filling or insert a cushion pad until it reaches your desired firmness.
8. Close the Opening
Fold the raw edges of the gap inward and hand-stitch closed using a slip stitch or ladder stitch for an invisible finish.
Enjoy your bunny bum cushion! 🐰✨
I would love to see your creations. Please tag me @LilRockyWear


Alternative Fabric Ideas
🐇 Soft & Fluffy: Sherpa fleece, minky, or faux fur for a plush feel
🐇 Classic Look: Cotton or linen for a neat, structured cushion
🐇 Velvet or Corduroy: Adds texture and a luxurious touch
🐇 Upcycled Fabric: Old sweaters, blankets, or baby clothes for sentimental value
💡 Tip: If using stretchy fabrics (like fleece or jersey), consider adding interfacing to prevent excessive stretching.
Troubleshooting & Tips
❓ My cushion looks lumpy after stuffing!
✔ Try tearing the stuffing into smaller pieces and distributing it evenly. If using a cushion insert, smooth it out before closing the gap.
❓ The paw pads are shifting while I sew!
✔ Use fabric glue or double-sided interfacing to temporarily hold them in place before stitching.
❓ The feet don’t look symmetrical!
✔ Before sewing, pin them in place and check the alignment. Adjust as needed to ensure they are level.
❓ I can see my stitches when closing the cushion!
✔ Use a ladder stitch (slip stitch) and pull the thread gently to create an invisible seam.

