Mastering Measurements: A Guide
IDEASTIPSMEASUREMENTSSEWING


Imagine your child wearing clothes that are tailor-made for their body and style—comfortable, flattering, and fun. Clothes that you made yourself with love and care. Sounds amazing, right? But how do you achieve this sewing dream?
A good way to start is by measuring your child rather than simply selecting from the age range.
While standard age or size sewing patterns work well for many children, you should also consider other aspects of your child's body shape besides their height. For instance, two children who are both 110 cm tall might have different lengths of torso, legs, and more.
With a few simple steps, you can ensure a perfect fit every time:
Start with a flexible measuring tape: A flexible measuring tape is essential for accurate measurements. It should wrap around the body easily without stretching or sagging.
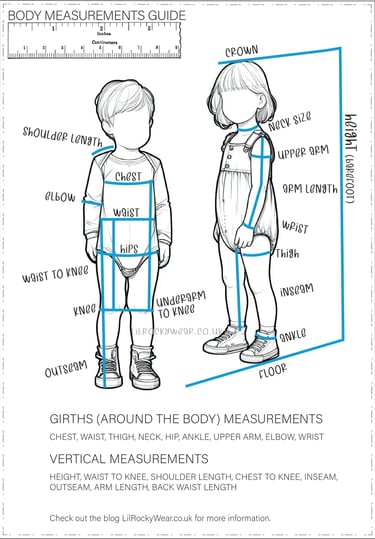
Understand girth and vertical measurements: Some measurements are girth (around the body), while others are vertical (the body's length, not just from head to toe).
Measure landmark points on your child’s body: Depending on the pattern, you won’t need to complete all measurements for all patterns. For example, if you are making the Seren Joggers, you can ignore the chest measurement and only focus on the waist and inseam. To find out which measurements you need, check the pattern measurement chart for the sewing pattern you want to make.
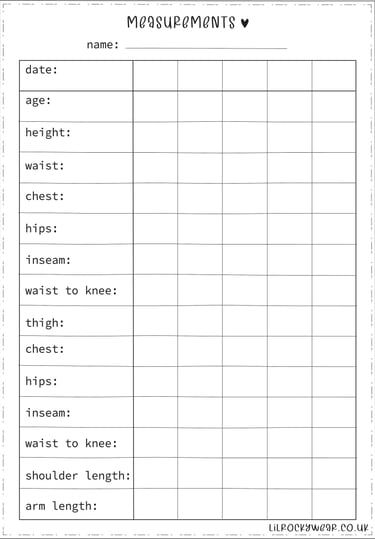
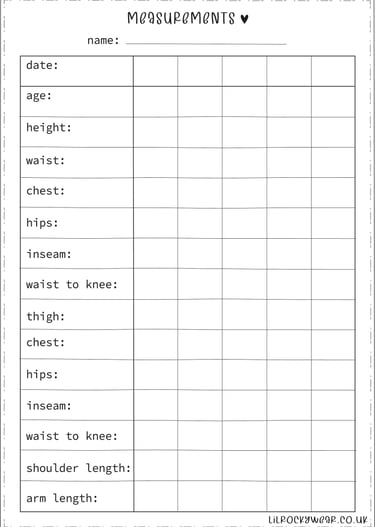
Take all measurements in advance and update regularly: It’s a good idea to take all measurements in advance and update them regularly, as children grow quickly. You can use my FREE printable to record the measurements or jot them down in a notebook with the date.
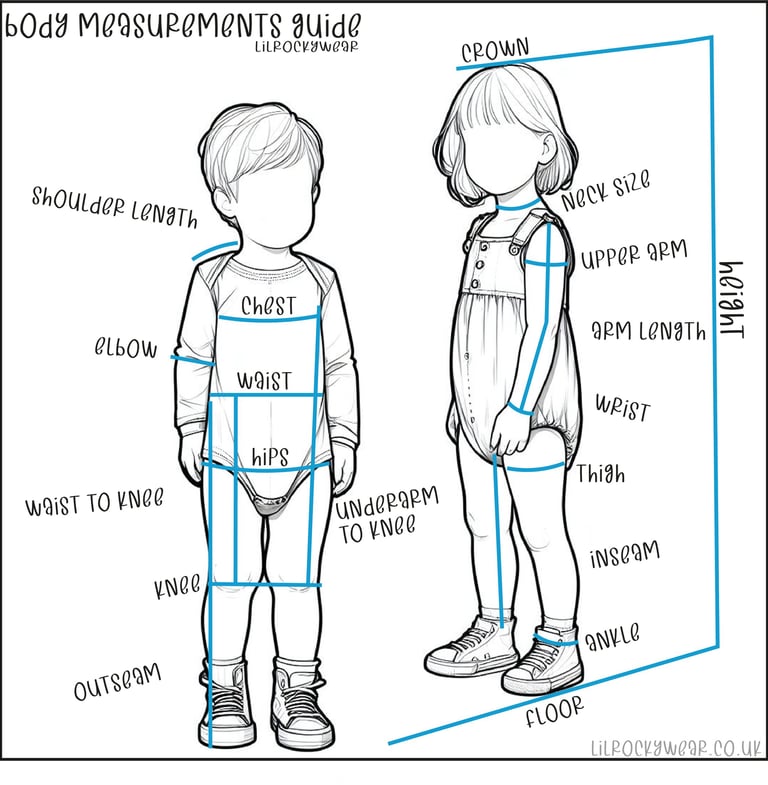
Girths (around the body measurements)
Chest: the widest point under the armpits and including the tips of the shoulder blades
Waist: the narrowest point, or at the bend in the waist.
Hip: the top of the hipbone, which includes the top of the buttocks. Usually the widest point, but can vary from child to child.
Thigh: the upper leg at the widest point
Ankle: the bony projection just above the foot
Upper arm: the widest point between the shoulder and the elbow. This measurement is taken with the arm bent.
Wrist: the bony projection just above the hand
Elbow: the bend in the arm
Vertical measurement and points
Crown: the top of the head (start point for height)
Height: the distance from the crown to the floor. The child’s height and other vertical measurements are taken with the child standing erect with feet together. A good tip is to mark the height of the child against a wall. Much easier to measure from floor to the mark on the wall.
Arm length: the distance from the shoulder edge to the wrist bone
Shoulder – as a vertical measurement start point - Positioned at the centre of the shoulder, between the arm and neck. It is the same level as the bottom cervical vertebra, the prominent bone at the back of the neck.
Shoulder length – distance from the base of the neck to the top of the arm
Outseam Length – The distance from the waist to the floor
Back waist length – distance from the shoulder or bottom cervical vertebra (the prominent bone at the back of the neck) to the waist
Inseam length – Distance from the crotch to the floor, have the child stand with legs slightly apart
Review and Main Takeaways from the Post:
Body Measurements:
Remember, you are measuring the body, not the clothes.
Body, or girth, measurements are taken around certain landmark points.
Younger children, both boys and girls, have similar measurements and proportions.
As a general rule, when choosing a pattern, if a child is between sizes, it is advisable to choose the larger size and alter it to fit.
Grading Between Sizes:
The next step to perfect-fitting clothing. Stay tuned for my upcoming blog post on grading!
Do you have any tips, future post ideas, or pattern requests? Let me know in the comments below!