Spark Joy This Holiday Season: Unwrap the Magic of Our Bright Stars Christmas Stocking!
Free Printable Pattern and PDF Instructions to sew a Christmas Stocking. Discover the enchantment of the holiday season with our Bright Stars Christmas Stocking at Lil Rocky Wear. Perfect for adding a festive touch to your home and delighting loved ones with special surprises.
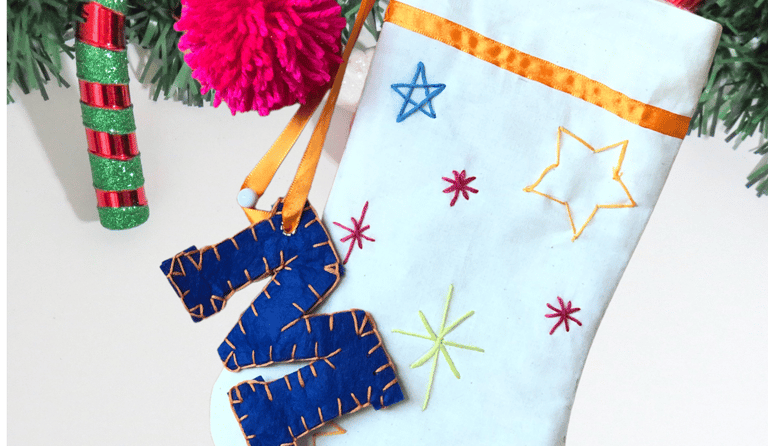

Super simple sew suitable for all abilities, great to craft with children, the bright stars lined stocking features 3 pattern sizes, an easy to follow stars embroidery pattern, pom pom template and blanket stitched name initial.
Materials
To make the stocking, pom pom and initial tags, you will need the following materials:
Woven fabric such as cotton, calico, fleece, or drill
Pom pom template (available for download)
Initial tag templates (available for download)
Embroidery template (available for download)
Stocking Size :
Large: 69x40cm (27 1/4 x 15 3/4")
Medium: 48.5 x 30 cm (19 x 11 3⁄4")
Small: 31x24cm (12 1/4 x 9 1/2”)
Fabric Req. CM (inch)
Small: 80 x 50 (31.5"x19.75")
Medium: 110 x 70 (43.25"x27.5")
Large: 150 x 90 (59"x35.5")
Instructions
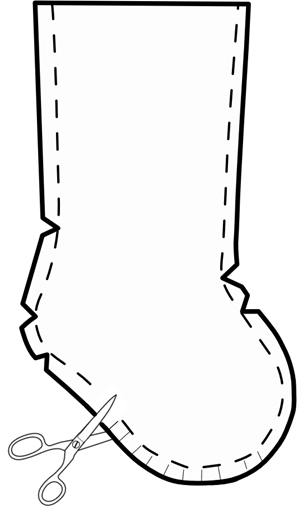
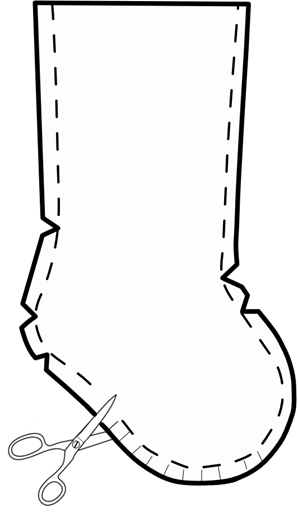
Start by downloading and printing the free pattern and instructions. The PDF contains detailed step-by-step instructions along with the templates you'll need. Print at 100%.
Print and cut, Select and print your template (small, medium, or large) Check that the printed test ruler is accurate to your ruler.
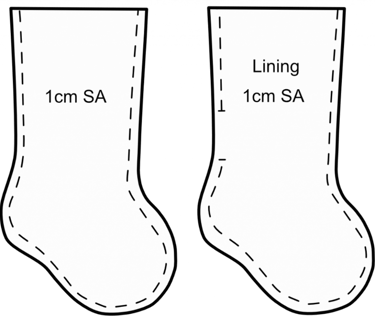
Iron your selected fabric and cut it out.
x2 outer fabric
x2 lining fabric
x2 hanging loops
1 cm SA included on all pattern pieces
Take one front piece and one back piece and check they are mirror imaged to each other.
CONSTRUCTION
Place the front and back RS (right sides) together.
Pin and stitch, using the 1 cm SA (already included in the template) around the stocking, leaving the top open.
Repeat for the lining front and back, but leave an opening along one side of the lining, approx. 6/8cm wide.
You should now have two stocking pieces, open at the top and one with a gap in the side.
Clip the curves around the SA of both stockings. Be careful not to snip into the stitches!
TIP: Pinking shears make light work of clipping!
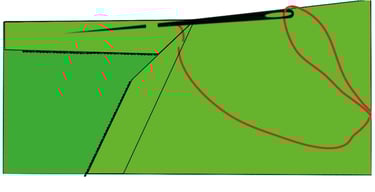
Hanging Loop
Check that you have two hanging loops cut out of mirror-imaged pieces.
RS facing, pin and stitch the two long sides of the hanging loops using the 1 cm SA. Clip and trim the SA, turn through to the right side, and press. Then fold it in half.
Joining Lining to Self
Insert stoking into the lining stocking (or vice versa); either way, ensure that the right sides are facing each other. Line up the side seams accurately, and then pop the small folded hanging loop between the two stockings. Line up the notch on the hanging loop with the side seam at the back of the stocking.
Check: the loop's raw edges are up and the fold is facing down.
Pin and straight-stitch around the top, joining the front and back pieces together with the loop sandwiched in between.
Next, turn through the two stockings to the RS using the opening we left in the lining.
Press and slip-stitch the gap closed.
*SlipStitch, sometimes called a ladder stitch. The stitch is almost invisible and is used to close openings. Work from right to left, and start with a knotted end and a matching thread for better invisibility!
Video Tutorial
If you prefer visual instructions, I also have a YouTube video tutorial available.
So why wait? Download the free printable pattern and PDF instructions now to get started on making your custom stocking.