Zips - Zippers
A Little Bit About Zips... ypes of Zips. Aquick guide to the main types. Understanding the different types of zips and their applications is the key to seamless (pun intended!) success.
ZIPTIPS

Understanding the different types of zips and their applications is the key to seamless (pun intended!) success.
Types of Zips
Here’s a quick guide to the main types:
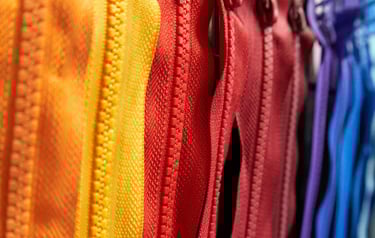
Metal – Durable and robust, ideal for leather and heavyweight fabrics.
Chunky Plastic – Lightweight yet sturdy, perfect for casual outerwear.
Coiled (Nylon) – Flexible and low-profile, great for lightweight garments.
Invisible – Discreet and elegant, often used in formalwear.
Open-ended zips are essential for jackets and coats, as they allow the garment to separate completely when unzipped.
Zips come in various lengths and colours, so always check your sewing pattern for the recommended size. It’s worth measuring your garment’s opening too.
Zip Lengths
When selecting a zip, it’s important to remember that the length refers to the functional part of the zip—the distance between the top and bottom stops. For instance, if you're purchasing a 23 cm (9") zip, this measurement only applies to the working teeth of the zip, not the full tape length. The actual total length of the zip will be longer, allowing extra tape for sewing into your garment.
Keep this in mind when measuring your garment’s opening and choosing the right zip for your project. Adjusting the garment opening is usually easier than shortening a zip!.
To help you understand the key parts of a zip:
Part and Description
Teeth: The interlocking pieces, usually made of metal, plastic, or nylon, that create the fastening.
Tape: The fabric strip to which the teeth are attached, making it easier to sew the zip into your garment.
Slider: The moving part that opens and closes the zip by interlocking or separating the teeth.
Puller: The small handle attached to the slider, used to move it up and down the teeth.
Top Stop: The metal or plastic piece at the top of the zip that prevents the slider from coming off the track.
Bottom Stop/Box: The piece at the bottom of an open-ended zip that holds the teeth together when the zip is fastened.
* Retainer Box: Found on open-ended zips, this is the box at the bottom that holds the pin from the other side to secure the fastening.
Pin: The metal or plastic piece on the opposite side of the retainer box that slots into it for fastening.
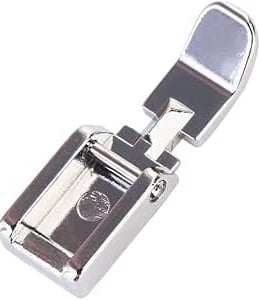
Zip Foot
There are two main types of zip feet to be aware of:
Using the correct zip foot for your project will make a noticeable difference in the accuracy and appearance of your stitching. It's worth familiarising yourself with both types to enhance your sewing skills!
Regular Zip Foot: Ideal for standard zips, this foot allows you to position the needle either to the left or right of the zip teeth, enabling neat and controlled stitching.
Invisible Zip Foot: Specifically designed for invisible zips, this foot has grooves underneath to guide the zip teeth, ensuring they remain hidden when the zip is closed.
Using the correct zip foot for your project will make a noticeable difference in the accuracy and appearance of your stitching. It's worth familiarising yourself with both types to enhance your sewing skills!
Preparing the Garment
Preparation is everything when it comes to zips.
Mark the seam lines: Clearly indicate the centre-front, neckline seam, and hem of your garment. Precision is key.
Use interfacing: Stabilise the edges by ironing on strips of interfacing 1 cm (3/8 in) wide, placed 3 mm (1/8 in) from the edge.
Neaten the edges: Prevent fraying by finishing the centre-front edges with a overlock/serger or zigzag stitch.
Where to buy:
Always try sourcing your zips and other haberdashery supplies locally or check out these online stores:
Zipper Station - Your One-Stop Shop for Zips


How to Insert a Basic Zipper
Sewing in a zipper might seem tricky, but with the right steps, it’s totally doable! Start by stabilizing the fabric with interfacing if needed, then place your zipper face down along the seam where it will be inserted. Use a basting stitch to temporarily hold it in place, or secure it with wonder tape for extra precision. Attach your zipper foot to your sewing machine and stitch close to the zipper teeth, stopping just before the pull. Finally, remove the basting stitches (if used), press everything neatly, and admire your work—zipper victory achieved! 🎉
If you're more of a visual learner, there’s a whole world of amazing YouTube tutorials out there to guide you step by step. Try searching for:
🔎 How to sew a basic zipper
🔎 Beginner zipper sewing tutorial
🔎 Sewing a zipper with a regular foot (if you don’t have a zipper foot!)
🔎 How to insert an invisible zipper (for a seamless look)
So grab a cuppa, hit play, and zip your way to success! ☕📺
Final Tips
Press as you go: Pressing is non-negotiable – it ensures crisp, clean seams.
Master the zip foot: It’s your best friend for precise, professional stitching (Regular and Invisible).
Practise on scraps: New to zips? A little practice on scrap fabric will boost your confidence.
Happy stitching, and remember – practice makes perfect!